Categories: Beginner
Overview
Hello,
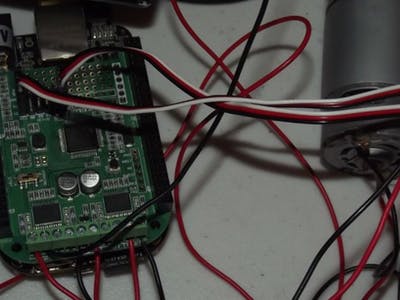
I want to mow but I do not want to mow. So, I am making a makeshift mower that will inevitably do the work for me, supposedly. Yea boy!
So, see the software in the attachments section and use this cmd to add the repo to your system from
GitHub.com
. The MotorBridge.py file is what is inevitably needed to run your own Python software on your machine (BBB hopefully or other variant).
sudo git clone https://github.com/Seeed-Studio/MotorBridgeCapeforBBG_BBB
Get Adafruit_BBIO v1.0.3 if you are using the Cape. The Motor Bridge Cape came out in 2015 and w/out updating the firmware, you may need this version of Adafruit_BBIO. It really depends on your system.
uname -r: 4.9.35-ti-r44 <<<< my system

cat /etc/dogtag: BeagleBoard.org Debian Image 2017-07-02 <<<< my system
Depending on your kernel and image (and board), you may have to update your uEnv.txt file for older images and older kernels in the /boot directory. If it comes to that, let me know or you can find me on irc at Freenode at motorbridgecape.
Oh and make sure you are using Adafruit_BBIO version 1.0.3 by using this cmd (Fustini told me about this command) on
Adafruit.com
‘s Forums:
python -c "import Adafruit_BBIO; print Adafruit_BBIO"
Sometimes this command works but other times it does not for whatever reason show a version.
So…to make sure you have v1.0.3, use these commands below.
sudo pip uninstall Adafruit_BBIO

sudo pip install Adafruit_BBIO==1.0.3
See config-pin info. at
https://github.com/beagleboard/bb.org-overlays/tree/master/tools/beaglebone-universal-io
.
If your default is not at uart on pin P9_21 and P9_22, use config-pin to set it up. Setting up config-pin is as easy as this:
In your terminal, type this command:
config-pin P9.21 uart

config-pin P9.22 uart
Oh and:
If you need the config-pin info. setup as uart on boot and forever until you change it, use this info. found at:
https://github.com/adafruit/adafruit-beaglebone-io-python
will show you how to set up you system if Adafruit_BBIO fails for some reason. They have a nice tutorial on how to use it, info. on config-pin, and other basics for setting up using the Adafruit_BBIO library.
There are so many setup variables for me, it is hard to think of everything right now but use this software in the
MotorBridge.py
file:
from Adafruit_I2C import Adafruit_I2C

import Adafruit_BBIO.GPIO as GPIO

import time

Reset = "P9_23"

MotorBridge = Adafruit_I2C(0x4b, 2)

GPIO.setup(Reset, GPIO.OUT)
Instead of:
from Adafruit_I2C import Adafruit_I2C

import Adafruit_BBIO.GPIO as GPIO

import time

Reset = "P9_23"

MotorBridge = Adafruit_I2C(0x4b)

GPIO.setup(Reset, GPIO.OUT)
See the line 37 in the
MotorBridge.py
library and see how it has changed in these two formats. Setting your bus number works w/out updating your processor/firmware on the Motor Bridge Cape which can be found at:
https://github.com/Seeed-Studio/MotorBridgeCapeFirmwareSourceCode
And the original:
https://github.com/Seeed-Studio/MotorBridgeCapeFirmware
Finally:
Set up your system to work on boot if you are not using extra software and a touch screen. You can find an
Adafruit.com
tutorial on setting up a service in Debian at
https://learn.adafruit.com/running-programs-automatically-on-your-tiny-computer?view=all.
Seth
Demo
P.S. Here is the action so far:
I have new software to test. So, please be patient w/ me.
Things change:
- My older motors are probably 12v motors.
- I only use a 12v battery. So, I am working on half duty w/ my motors.
- My motors are geared.
- I want to update the motors to 6v but I need to find the correct reference.
- I am using a BBGW, Debian Distro Stretch, a Motor Bridge Cape, and Python to put this together.
- I am also using Adafruit_BBIO for a library b/c the MotorBridgeCape/MotorBridge.py library demands it. It is listed in the library.
- If you have any questions or concerns, please let me know.
Seth
P.S. If you get bored, please contact me to let me know what is going on, esp. if you have copied this info. to use and it works. If it ceases to work and you are having issues, please let me know too.


Comments are not currently available for this post.